Wednesday, February 29, 2012

Fashion Upcycle Challenge Workshop

Beverly's Before & After: A shapeless dress turned into a form-fitting tunic

Dae's Before & After: A blouse made edgy when shoulder pads are removed and a strap is attached giving the neckline an asymmetrical slant

Stella's Before & After: Awkward stretchy pants and an ankle-length black dress turned into funky leggings paired with a black mini-dress

Toni's Before & After: A perfectly good sweater with one tiny hole turned into a unique work sweater paired with a patterned skirt

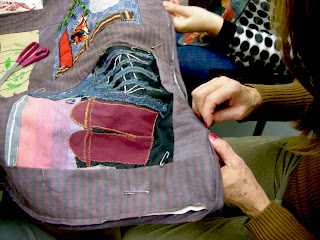
Fashion Upcycle Challenge: A complete success! Participants holding up their upcycled garments after an intensive two-day session totaling six hours.
This past weekend, four intrepid lovers of fashion came together to take ArtPlay's Fashion Upcycle Challenge and the results are in: a complete success! The four participants came to the challenge with a variety of skills and levels of sewing experience but all walked away having transformed slightly hum-drum garments into upcycled works of art.

The clothing was provided by My Sister's Closet, a retail store associated with the YWCA which provides clothing in a comfortable and fashion-forward retail environment to battered women in need of interview and work clothing. The Upcyclers returned their works of art to My Sister's Closet in the hopes of adding to the store's collection of great clothing. For more photos from the challenge, click here.

Tuesday, February 28, 2012

Week 12: December 8th - The Piecemakers' Last Class!

Anna's completed Cathedral Window - gorgeous!

Dana H receives her certificate of participation, daughter Harper helps her accept it.

The Piecemakers attaching the binding to their Local Fabric quilt.

Individual squares sewn, sashing added, batting and backing pin basted, quilted and now bound. A round of applause for the Piecemakers!


Everyone was able to participate in the hand-quilting of the Local Fabric quilt.

Envelope pillowcase demonstration

Cut two pieces of fabric the width of your pillow. If you are like me, you will want a plump pillow. For a 12"x12" pillow, I generally make my front image 12"x12". So your two back pieces will be 12" wide and between 8 and 10" in length. This is a trial and error measurement. Depending on how much fabric you fold over for each of your hems, you might need more or less in length.

Fold edge of each piece over twice and press. These will be your hemmed edges.

Hem edge of each piece. Running stitch or back stitch will work if sewing by hand.

Now you have two hemmed pieces of fabric which you will use to make the back side of your envelope pillowcase.
If the front of your pillowcase has been cut and squared to size, arrange your two back pieces as shown. Right sides facing each other so that once the case is sewn, you can flip it right side out.

Both back pieces laid on top of front piece, right sides facing.

Make sure there is enough overlap between your two back pieces. If there is not enough overlap, the pillow will "peek" out once it is placed in the pillowcase. If there is too much overlap, the pillow will not fit in the case. This is also a trial and error measurement, however, 2-3" of overlap is generally sufficient.
Sew around all four sides of pillowcase at a quarter of an inch distance from the edge.


Detail of sewn edges - when sewing by hand, back stitch is recommended.

Clip corners

When back is sewn to front and all corners are clipped, your pillowcase is ready to be turned.

Turn pillowcase right sides out.

Turn one side of back half and then the other.

Poke corners out with a pencil or pen.

Insert pillow form and fluff and adjust where necessary.

Enjoy pillow!

Enjoy pillow some more!


Friday, February 3, 2012

Twisted Stitchers: Week 3

Ellen's cuffs from the previous class demonstration. Love the cats and the whale!
One of Nancy's cuffs from the previous class demonstration. She made a ruffle!

Some of Nancy's cuffs from the previous class demonstration.

Picking out fabric for this week's demonstration. So many to choose from! Thank you to Lorrie Thomas for generously donating to our class.

Creative clutter!

Shannon holds up her circle, ready for the demonstration and Meredith cuts a circle out. Check out her awesome cuff from last week's class.


Nancy's hexagon flower with button

Nancy's composition is starting to come along


Shannon's hexagons

Ellen's hexagons

Kimberly's hexagons

Tammy's hexagons

Tammy will make a flower along the lines of the traditional "grandmother's garden"

Thursday, February 2, 2012

Week 11: December 1st

Cathedral Window


Cathedral Window quilts are sewn by hand almost entirely - and the process of folding fabric to make the window panes gives the quilt a natural thickness so that the work doesn't need batting or a backing.


Sample that was made using a wedge ruler

Cathedral Windows in progress!

Second-to-last meeting of the Piecemakers! A busy night indeed: continue hand-quilting Local Fabric quilt, make binding and put binding on quilt, hand sew the binding down, learn about Cathedral Windows and create a sample Cathedral Window block. It was a long night, but the Piecemakers were up to the challenge. While their quilt wasn't completed by the last night of the class, the binding was on and a significant amount of quilting was completed. The Piecemakers decided to donate their quilt to ArtPlay and it will be hung in the main building soon. Stop by and see their beautiful work in person. Thanks to the Piecemakers for a fantastic quarter!